- Do everything, and I mean everything, by email. If you have conversations over the phone or in person, email a follow-up to reiterate what you have agreed upon. Vendors tend to forget what they tell you verses the 50 other people they spoke to that day, and you don't want to to be their word against yours. Also, you could be the one who is mixing up information, and that is embarrassing!
- Keep copies of every contract in one place. This seems obvious, but it is amazing how quickly things get lost, and then you can't remember exactly what you have agreed to.
- On that note, be OCD organized. I am not typically this person, but it really does help. Have a folder on your computer with everything wedding, a folder in your email for everything you have sent and received to vendors, and a physical folder you bring with you to any consultations and appointments to keep everything they give you in.
- Nail down every single vendor as soon as you have a date, and pick your date based on the availability of the one thing you don't want to compromise on (for my it was my venue). We will be engaged almost exactly 12 months. I booked everything immediately, and it was insane to me how many vendors weren't available with a years notice. We now live in a time of year and a half to two year engagements. If you wait procrastinate, be prepared to use your 2nd or 3rd choice.
- I have blogged about this before, but beware of the wedding dress appointment. I think this is a very different experience for everyone, but there are some universal truths. Do not watch Say Yes to the Dress...ever. Chances are you will not have a moment when you put on "the dress" and bust into tears and know immediately. This is your freaking wedding dress! It's emotional, it's expensive, and you know everyone will be staring at you in it all day. You have a million thoughts in your head that there is no changing your mind once it is done. Prepare yourself for this, and you may not have an emotional breakdown half naked in the dressing room with the sales associate, as I did.
- Don't be afraid to say what you want along the way. It's ok to pull the "I'm the bride card" every now and then. Now, this has never exactly been a problem for me. I am not a very indecisive person. However, it's easy to find yourself caving into what other people want because there are just so many decisions to be made, and you are sick of making them. If something really matters to you, it is ok! At the same time, don't be afraid to hand over the reins to a trusted sister, friend or mom in some cases. If you honestly don't care what color the napkins are, let someone else make the decision.
- This may be an unpopular comment, but do not ask your bridesmaids their opinion on their dress. I don't say this meaning to pick whatever you want with no thought to them. Only that if you ask for opinions, be prepared to get them! If you know your bridesmaids are all in college or graduate school, they probably cannot afford a $300+ dress and shoes. If you know it is very likely you will have bridesmaids who are pregnant at your wedding (as I did), don't buy a form fitting, unforgiving dress. The point of this is, you cannot please everyone, especially a group of females with different tastes. If they are your bridesmaids, you should know them well enough to understand their financial status and body issues. Keep this in mind, and pick a dress. Again, if you ask opinions, you will get them, and you will probably be more confused than when you began.
- Buy an etiquette book. This is my personal opinion, but there many things you can do to make your wedding your own, and some that people are probably going to say are just tacky. Southern ways die hard, love it or hate it, it's true. Obviously not everyone will agree with this, but it really is a great resource. When it came to the wording of my invitations, it really helped. It's also helpful to realize certain things that could be offensive to people that probably wouldn't have occurred to you. Although, some of what they say can be taken with a grain of salt, Ex: I did not think it was necessary that my ring bearer only wear a black or navy suit, or that wearing red to a wedding means you're sleeping with the groom (but I absolutely will judge you if you wear white, it's not ok. I don't care what anyone says, it is not).
- Your invitations matter. It is the way people will form their expectations of the entire event. They should match the formality of your wedding. Burlap is one of my favorite new trends, and can be super dressed up in decorations, but if you send burlap invitations, don't be surprised if people come in jeans. If that's not what you want, rethink the invitations.
- Primp. It is that simple. You will like all of your pictures more, bridal, engagement, day of, if you do. Get a spray tan, have your hair, nails, and/or makeup done. Trust me, you'll just feel better, and it will show. I don't care if "you're not that girl" blah blah blah...truth bomb- we're all that girl.
- The last thing I would say, is that you should expect exceptional customer service. I will admit, I have high expectations for this in general. Everyone you are dealing with is in the customer service/hospitality industry. If you feel you are not being treated with the level of courtesy someone would who is spending a great deal of money with that vendor, by all means speak up! I learned the hard way if you let things slide, problems will mount. Keep in mind though, that you are dealing with real people. There are obviously going to be some mistakes made. Treat all of your vendors professionally and with respect, and you should get the same back. If not, you need to speak up and let them know they are not meeting your expectations.
Friday, November 16, 2012
Confessions of a Semi-Psychotic Bride
Everyone knows that wedding planning can be stressful, and I don't think anyone doubted that I would be completely obsessed. Both have proved to be true. I still feel like one of my callings in life is to be a wedding planner. I will have been in almost 10 weddings by the time June rolls around, so nothing has been much of a surprise to me. Combined with that, and the five months that have passed in our planning process, I have learned some things I think are crucial to wedding planning.
Monday, October 29, 2012
Fantastic Fall
So far, Fall has been a very busy season for the Future Simmons! First, we had an amazing engagement party October 13th at Squire Creek in Choudrant, La. My parents are wonderful for throwing such a great party and allowing our bridal party, family, and friends to all meet!


We also did something I've wanted to do forever, and in Tennessee it was perfect! In case you didn't know, Fall in Tennessee is absolutely stunning! This being said, we channeled our inner child and went to a pumpkin patch! If anyone is around this area I highly recommend Waldon Farms in Smyrna. It was like a pumpkin fair more than pumpkin patch! There was a petting zoo, corn maze, hay rides, music, and delicious treats. I know you're probably reading this laughing...but I loved it!


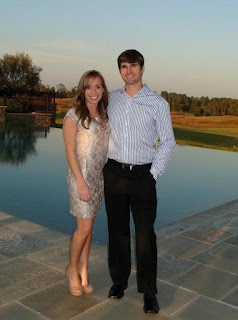
We took engagement pictures on the 27th! Meagan Fisher took them and a sneak peek is up on her blog! I am dying to see the rest, she did a great job!
We also did something I've wanted to do forever, and in Tennessee it was perfect! In case you didn't know, Fall in Tennessee is absolutely stunning! This being said, we channeled our inner child and went to a pumpkin patch! If anyone is around this area I highly recommend Waldon Farms in Smyrna. It was like a pumpkin fair more than pumpkin patch! There was a petting zoo, corn maze, hay rides, music, and delicious treats. I know you're probably reading this laughing...but I loved it!


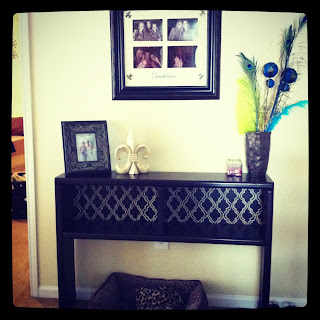
Last, I thought I'd post pictures of my last few projects that have been occupying my time! First, I stained the top of the Goodwill desk I bought, and made it into a sofa table. I could still reattach it to the top of the desk later, but right now I like the way it looks alone! I stained it the same way I did the desk, and then just stenciled a little pattern on the back.


I've also been experimenting with creating mercury glass for the wedding centerpieces. I love the look of mercury glass...but it is so dang expensive! I read several different blogs and the methods varied, but it came down to the Krylon Looking Glass spray paint. I searched everywhere, Hobby Lobby, Michaels, JoAnne's, and finally good ole Walmart had it. People's opinions varied on spraying outside vs inside of the glass. I chose outside so you can actually put flowers in them. I'm still playing around with different methods, but this is what I have so far! They are more silver in real life, so I'm debating painting some gold first next time.

Somehow in all my "free time" I've also managed to start coaching junior cheerleading (7-11 year old girls) twice a week! They cheer for football games in their same age division. Note: this is not flag or touch! These little babies are out there in full pads tackling each other! It's definitely been a different experience. That age is full of energy and comments about everything! They are great, but I think I will stick to high school and older when it comes to teaching full time!
Fall has been crazy...and as graduation in December approaches, Holiday Season gets into full swing, and more wedding showers happen, it will only get crazier!
I love every second!
Friday, September 7, 2012
How to fake being crafty

So this week I decided to make a cute little burlap pumpkin. I'd had my first pumpkin spice latte and been to my first football game of the year, so I felt it was time to decorate for fall, which happens to be my favorite season. After I made this little dude, I had a bunch of burlap left over because I am the worst possible judge of amounts of anything. (For real, all those games when you guess how many pennies or m&m's are in a jar I normally over or under-guess by ridiculous amounts...same goes with judging distances or sizes).

Anywho...when I have random craft supplies around my house I tend to get a bit antsy and want to play. I have engagement pictures (or I guess I should say we) coming up October 6th. As I've perused pinterest I've seen all these cute burlap banners. Originally I was going to make a fall banner for my living room, but I figured what the hay, I'll just see how this comes out.
I ended up really liking it. If I do say so myself, I think it looks better than a lot of these crazy peeps on Etsy that charge $20.00 + for the same thing! You don't have to be super artsy to do this, heck, you don't even have to have good handwriting! Here's how:
So I generally like my handwriting, but I wanted something that looked really nice and neat if it would be in pictures we'll have forever. Here are the supplies you'll need:

- burlap (I bought 1 1/2 yards and made the pumpkin and had more than enough left over for this)- $7/ yard
- exacto knife- already had it but I think they're around $10 if you need one
- paint and brush- $.97/bottle
- hot glue gun- already had it
- a printer
- yarn- left over from another project, but also very cheap and you could really use anything you have laying around.
Basically if you are just buying the actual supplies for the banner you are spending about $5 total. Don't forget the 40% off coupon you can download on your phone to use on any item at hobby lobby!
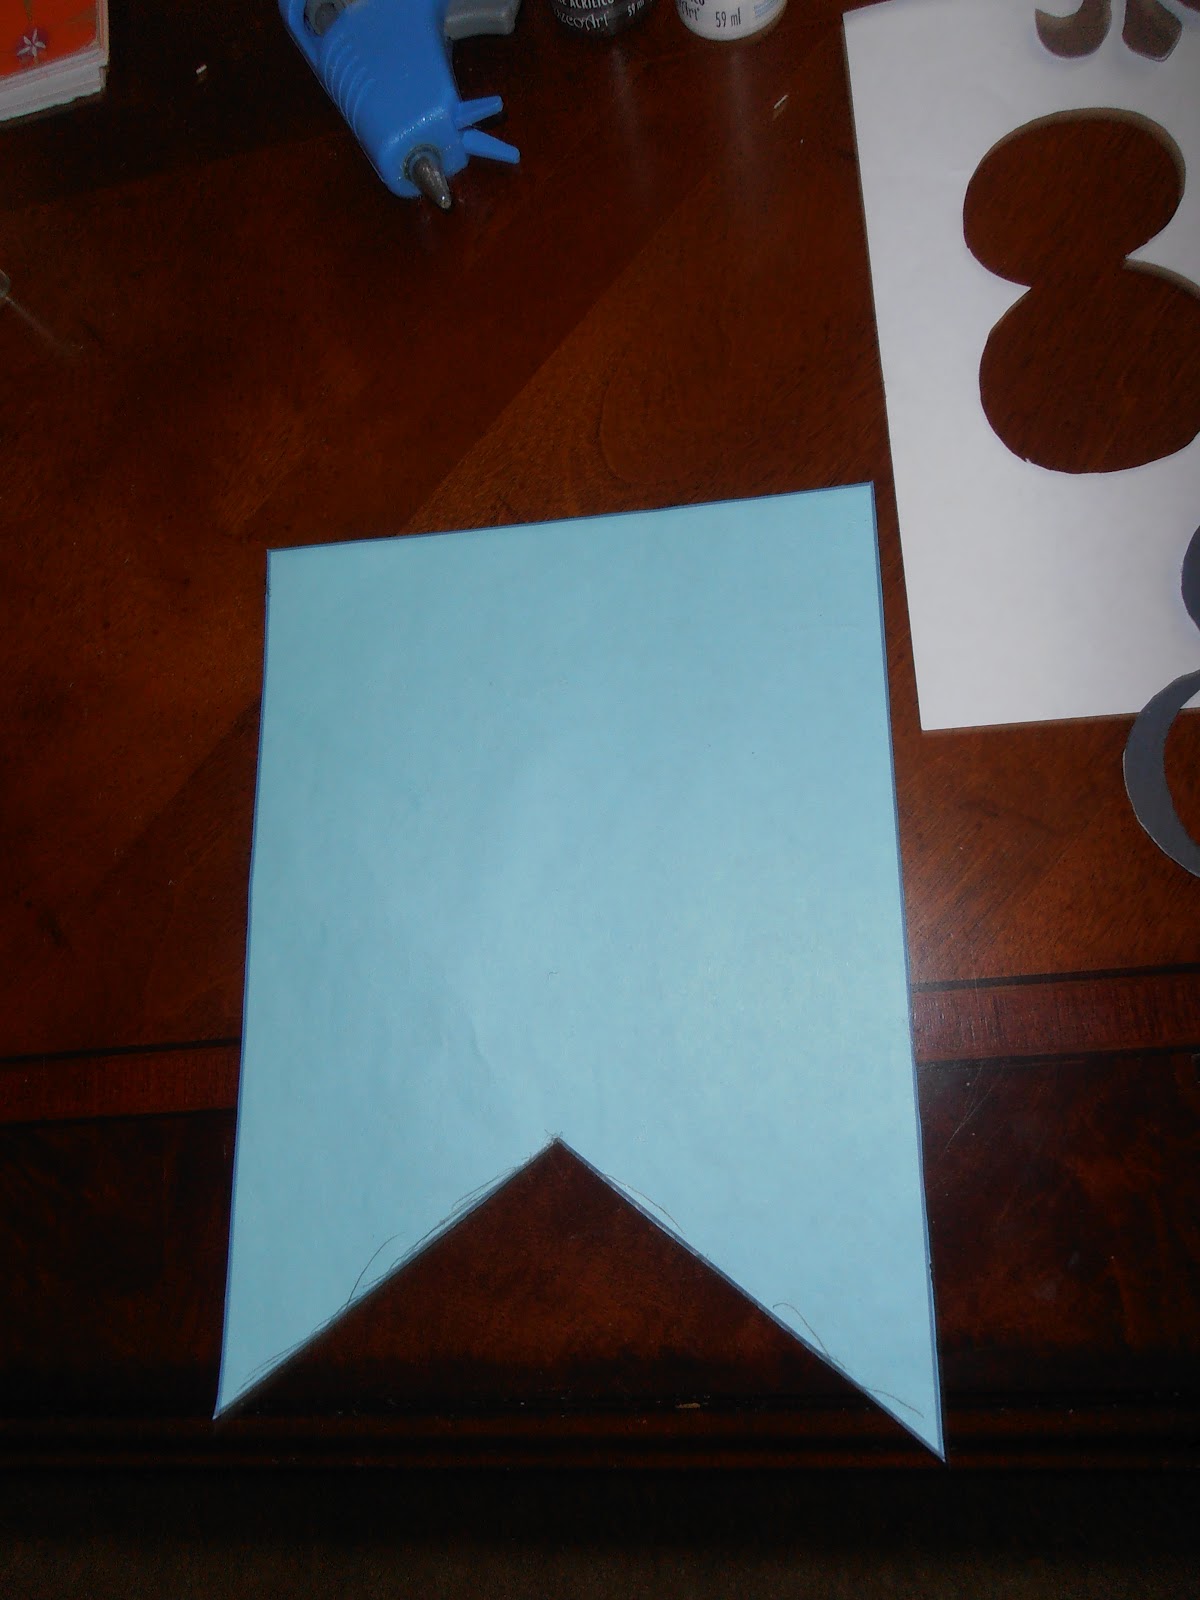
First I made a document to be my stencil for the burlap pieces:
Step 1: Insert a shape- chose rectangle (chose no fill to save your ink)
Step 2: Insert a triangle on top, this is the piece you will cut out

Step 3: Add a text box and type the size and font you want to see how much bigger or smaller your triangle needs to be

Step 4: Play around with fonts and sizes until you are happy with the look. You may need to print once to see the actual size...or at least I did. Back to that whole not being able to accurately judge sizes

I chose the California font and ended up with size 460 I believe.
I also just used a clip art fleur de lis and did it the same way- print, exacto knife, trace.
Next you will cut everything out with your exacto knife(scissors are fine for the big piece). You could use scissors for everything if you dont have an exacto knife, but it's going to be much more difficult to get it right, especially with the middle of letters like the 8.
Looks a little crooked, but it was just the way I was holding my camera.
Exacto knife is definitely the way to go

Once you have cut these out and cut out your burlap pieces, you are ready to trace. I ended up cutting out 2 pieces of fabric per flag and hot gluing together so they were more sturdy. Also they didn't have the darker burlap I wanted at Hobby Lobby when I went, and I thought this would help make it look a little darker.
Last you just hot glue a piece of yarn to the back of each flag. Here is the finished product! Much better than paying $25 on etsy + shipping if you ask me!


All this project takes is patience! You don't have to have a artist's bone in your body! If you can use Microsoft word, you can make it look professional!
***If you're curious about the pumpkin, I did it much the same way. I did have to free hand the pumpkin outline, but I cut out and traced the letters and traced the bottom of the paint bottle for the polka dots. The pumpkin is stuffed with plastic bags and the bow is green raffia. Really inexpensive door hanger!!
Wednesday, August 15, 2012
This Week's Project: The Goodwill Desk....
 |
Now that I have another bedroom...I really needed a desk so I could actually have somewhere to put all of my school junk! Enter the $25 Goodwill desk. The second picture is the keyboard panel pulled out, it gives you a better picture of the before color. It's your typical 90's honey oak color. Bleh.


I bought it as soon as I saw it, knowing that I could probably find some cool way to paint it on Pinterest. It actually has an attachment with a little shelf that goes on top, but I wanted to make sure I had enough stain before I did that part too.
Instead of painting, I found what seemed to be like the easiest method ever to re-staining furniture or cabinets. I figured I might as well give it a shot. If you decide to do this, definitely read the tutorial! Basically you use a gel stain to refinish so it still looks like wood and you see the grain, instead of painted. You don't really have to sand or prime, or anything. I am lazy when it comes to those steps, so perfect!
She lists all the specific things necessary on her blog, but the only ones you probably don't have around your house already are these 2 guys. The gel stain and poly-urethane top coat. They were less than $9 each and I had plenty. I used Java, which is the darkest color, because that's what she did. I'm curious to see what the other colors come out to look like!

I ordered the gel stain and top coat from amazon and and it was here in just 3 days. I only ordered the little baby 1/2 pint of each for this desk and I still had a some left over. According to this Monica, who's instructions I was following, you absolutely have to use the General Finishes brand. I was skeptical (that had paid endorsement all over it) and I think you could probably get away with another brand, but I went with it just the same. Why not, right?
First you just clean the wood with some general cleaning solution...aka Clorox wipes, and lightly sand. I probably spent no more than 10 minutes on the whole desk. Your really just getting the funk off of it, you aren't trying to sand layers off. So blogger Monica says to apply the gel (which looks like pudding) with a man's sock. Well I was fresh out of those, so I just used a foam brush...back to the lazy with small steps
This is what the first coat looked like going on...you do really thin layers, which is easy with the gel. (See the pudding??)


I waited 24 hours for the 2nd coat. You only had to wait 12, but I was not about to do another coat at 2am.
This is the top after the second coat, you can see the original color on the back panel:


As usual, I should have listened to the person who knew what they were talking about. I did the 3rd coat with a sock instead of a sponge brush and good grief did it go on faster and smoother! It probably took me less than half the time when I switched to the sock.
To be honest, I didn't really understand what she meant by applying it with a sock. Turns out you literally just put a sock over your hand (make sure you have a glove on under) lightly dip your fingers it in the gel and lightly wipe across the wood. Super simple, silly me. Should've listened.
Side note, if you do want a more weathered or rustic look, you would want to use the sponge brush.
After the 3rd coat with the sock:


Disclaimer, it is a little darker than these pictures. It is pretty much the darkest brown there is before black, but its pretty! Also, please disregard the random drum paraphernalia on the floor, my wonderful fiance has no where to keep it so I ended up with it...
So at this point, my girl Monica says to let it sit for 5 days before applying the top coat. If you notice a trend...I didn't want to. I applied the last coat of gel Saturday morning and the first top coat Tuesday afternoon. It came out just fine.
I applied 1 coat of the gel poly top coat with a sponge brush, let it sit for 24 hours, and did another. This does go on a little thicker than the stain, so I went through more of this, but still had plenty for 2 coats. I had to move the desk inside because rain started to come in my patio during the 3 1/2 day drying period and I couldn't deal with moving it back outside to do the top coat. I would recommend doing the poly outside or at least well ventilated. I got a little light headed!
The last thing I did was add a little knob from Hobby Lobby to the drawer for some extra pizazz. "The only thing that separates us from the animals is our ability to accessorize" right? Thanks, Steel Magnolias. I had some issues since I don't own a drill. That's an hour of my life I don't want to think about again.


In the end, I am in love with the result. I think it came out pretty amazing! The close up picture looks black. In person it is very dark brown, like the picture on the right. This is after 3 coats of gel stain and 2 coats of poly-urethane.
Not count the drying time (because you don't actually do anything) I'd say it took me about 4-4 1/2 hours total. All the materials, including the original desk, cost about $50. Not too bad I'd say! It's a super easy way to bring a bleh piece of furniture back to life!
Sunday, August 5, 2012
Moving in the Rain
This weekend I moved apartments...but unfortunately just down the road and still in Murfreesboro. (I'm a not huge fan of this city). Murfreesboro reminds me a lot of Monroe. No offense to Monroe residents, but its really crowded, everything is spread out, and traffic is horrible. It's still a nice, safe place to be though so it's fine for now!
Anywho... the good news is that now I have 2 bedrooms and 2 bathrooms, thank goodness! My tiny 1 bed/1 bath served me well the last year, but that is a long time to be somewhere so small! I felt like Trigger and I were on top of each other and all my stuff all the time, and Trigger is not a very big person (yes I said person, don't judge). Yesterday my fantastic fiance and brother moved all of my big stuff in the heat and up a very narrow, tall staircase. Today I had full intentions of moving the rest, including all of my clothes. Instead, it decided to storm all day. Perfect procrastination excuse! I am in denial that it is not yet fall, and with this 79 degree rainy weather, I decided to pretend like it was.

Basically, instead of moving, hanging pictures, or doing anything remotely productive, I decided to spend my time blogging my dad's (correction from my father, it is my Papaw Aubrey's) chili recipe. You're welcome. It is my favorite, and it is easy enough Jacob could probably make it...well, maybe. Baby steps with that one, he's still on cereal and frozen bags of stir fry. For anyone who needs something super easy and cheap...I love this recipe. This is what you'll need:

Plus whatever type of hamburger meat you prefer. My favorite is deer meat, but my future sister in law will have to work on that for me.
I do everything to taste, so I don't have any exact measurements. You can substitute regular V-8 for the spicy hot if you aren't into Louisiana heat. The more chili powder and seasonings you use, the less it will taste like V-8. *Note, if you absolutely hate V-8, this recipe isn't for you. It is the base after all. I don't personally like to drink V-8 straight, but I do love this chili. In a nut shell: add everything, taste, add more, stop when you like the taste. It's pretty complicated...except not at all.

Brown your hamburger meat. I usually put some wishishere sauce and tony's in while I brown it. Then throw in the crock pot with everything else. Cook on low for 6 hrs or high for 4. I used to make this all the time without the crock pot. One day I tried it this way and wow...the taste is substantially better when it cooks slow. I've always heard that about chili and blah blah blah, but I've never believed it.
This chili is more of a soupy consistency, not super thick like the nasty crap from the can. In summary, its super easy, cheap, and delicious. Add some cheese and some saltines and you're golden.

Anywho... the good news is that now I have 2 bedrooms and 2 bathrooms, thank goodness! My tiny 1 bed/1 bath served me well the last year, but that is a long time to be somewhere so small! I felt like Trigger and I were on top of each other and all my stuff all the time, and Trigger is not a very big person (yes I said person, don't judge). Yesterday my fantastic fiance and brother moved all of my big stuff in the heat and up a very narrow, tall staircase. Today I had full intentions of moving the rest, including all of my clothes. Instead, it decided to storm all day. Perfect procrastination excuse! I am in denial that it is not yet fall, and with this 79 degree rainy weather, I decided to pretend like it was.

View from the new apartment...Trigger loves having a balcony, and I may be a little obsessed as well.
Basically, instead of moving, hanging pictures, or doing anything remotely productive, I decided to spend my time blogging my dad's (correction from my father, it is my Papaw Aubrey's) chili recipe. You're welcome. It is my favorite, and it is easy enough Jacob could probably make it...well, maybe. Baby steps with that one, he's still on cereal and frozen bags of stir fry. For anyone who needs something super easy and cheap...I love this recipe. This is what you'll need:

Plus whatever type of hamburger meat you prefer. My favorite is deer meat, but my future sister in law will have to work on that for me.
I do everything to taste, so I don't have any exact measurements. You can substitute regular V-8 for the spicy hot if you aren't into Louisiana heat. The more chili powder and seasonings you use, the less it will taste like V-8. *Note, if you absolutely hate V-8, this recipe isn't for you. It is the base after all. I don't personally like to drink V-8 straight, but I do love this chili. In a nut shell: add everything, taste, add more, stop when you like the taste. It's pretty complicated...except not at all.
- 1 bottle V-8
- crushed red pepper
- chili powder
- cayenne pepper
- Creole Seasoning (I prefer Tony's but Tennessee isn't cool enough to have it in stores, so I settled for Zatarains)
- 1 lb hamburger meat (for thicker chili, use more meat and/or add beans).
- I think beans in chili are gross...but feel free to add them if it makes your heart happy.

Brown your hamburger meat. I usually put some wishishere sauce and tony's in while I brown it. Then throw in the crock pot with everything else. Cook on low for 6 hrs or high for 4. I used to make this all the time without the crock pot. One day I tried it this way and wow...the taste is substantially better when it cooks slow. I've always heard that about chili and blah blah blah, but I've never believed it.
This chili is more of a soupy consistency, not super thick like the nasty crap from the can. In summary, its super easy, cheap, and delicious. Add some cheese and some saltines and you're golden.

Thursday, July 19, 2012
Wedding Planning So Far!
Last weekend I flew to New Orleans and tackled a LOT of wedding junk in one weekend! It was so fun, but soooo exhausting! I was lucky enough to have my favorite sister, mom, and future mother in law with me! I can now mark bridesmaids dresses, invitations, ceremony/reception, rehearsal dinner, and my dress off my list! I love it, but I'm really glad you only buy one of those in your life!! It was so much more stressful than I ever imagined! If any of you are in the market for a dress...let me tell you a #1 rule- STOP watching Say Yes to the Dress!!! Haha it is misleading and makes you feel like a crazy person when you don't walk out of the dressing room and see the birds from Cinderella dancing around singing a song when you put on "the one". It's just not reality! I will this: bring a small number of people whose opinions you trust, try on a few dresses before your big appointments so you have a better idea of what you want, and to not get wrapped up in how you've always pictured yourself. I did this and it made me so stressed! I always pictured myself in some ridiculously big princess dress, and let me tell you, the only thing ridiculous was how I looked in it! No mam.
Check out both our amazing photographers (like I am normal enough to just have one)!
Meagan Fisher is doing our engagements in the Nashville area since trying to get both Jacob and I to South La and hoping the weather cooperates might be a bit of a task! Meagan was recommended to me by my friend Aaron, and when I met her this week I knew this would be a great match! She was soo sweet and I can't wait for our shoot!
http://blog.mfisherphotography.com/
Brandon ONeal was the photographer for my both good friends Kim and Jordan's weddings! He came highly recommended by them and Jacob's favorite picture of meBrandon took at Jordan's wedding! I have complete confidence that he can deal with my level of crazy!
http://www.brandononealphotography.com/
I changed my wedding colors about 4 times this past weekend....and finally landed on this:
I've been obsessed with coral since high school (my room was painted a very bright obnoxious coral) and I love it to this day! I went back and forth a lot, and decided on navy for the dresses and coral for the flowers. Hopefully all 9 of my beautiful bridesmaids like it!!
That's probably more than your fill of wedding... stay tuned for the crazy! Oh and of course I made a wedding website:
http://JacobAndCaty.ourwedding.com
Check out both our amazing photographers (like I am normal enough to just have one)!
Meagan Fisher is doing our engagements in the Nashville area since trying to get both Jacob and I to South La and hoping the weather cooperates might be a bit of a task! Meagan was recommended to me by my friend Aaron, and when I met her this week I knew this would be a great match! She was soo sweet and I can't wait for our shoot!
http://blog.mfisherphotography.com/
Brandon ONeal was the photographer for my both good friends Kim and Jordan's weddings! He came highly recommended by them and Jacob's favorite picture of meBrandon took at Jordan's wedding! I have complete confidence that he can deal with my level of crazy!
http://www.brandononealphotography.com/
 |
That's probably more than your fill of wedding... stay tuned for the crazy! Oh and of course I made a wedding website:
http://JacobAndCaty.ourwedding.com
Saturday, June 23, 2012
Boring summer = Crafts!
I have mostly online classes and no work, so that means I have nothing but time in this tiny apartment! Laying out at the pool gets really old really quick. Thus far, I have made a wreath for my friend Aaron's house, one for my future cousin Erin and Paden's baby boy, and a nice bow tie for Trigger! Even the least crafty of people could make these, they are all ridiculously easy!! I figured I'd share...
Aaron's wreath
Super Simple! I won't lie, I got the idea off Pinterest...

Jace's Baby Shower
Again, just ridiculously easy! This just takes some patience because wrapping the yard takes a while and my hands started to hurt. I am a big baby though...

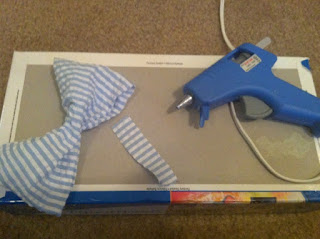
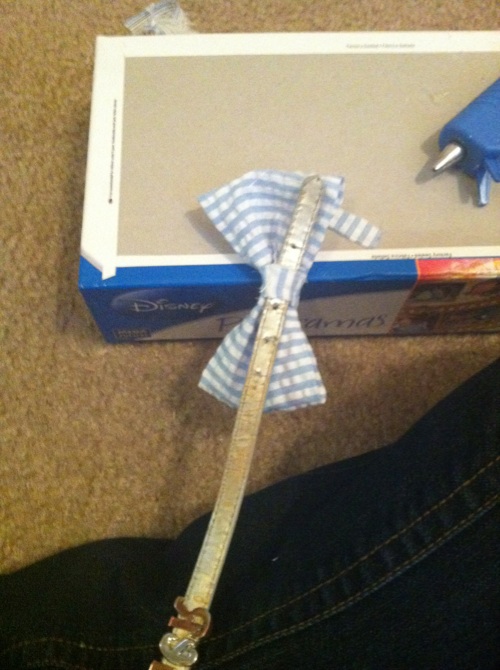
Trigger's Bow Tie
I saw these on Etsy and lovedddd them, but obviously I dont have $30 to spend on a dog collar. I googled how to make a bow tie and just replaced "sew" with hot glue!
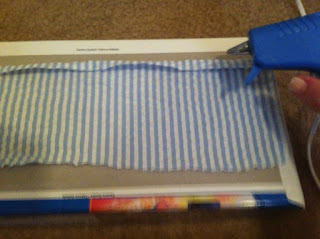
I felt like to make a seersucker bow tie I really needed a mimosa. Luckily Jacob had champagne the jewelry store gave him for buying my ring :) I ended up not using the iron adhesive because it was so small. I bought 1/2 yard of fabric from hobby lobby and could have done with about 90% less than that! Total it was only $5

Next I cut a 12x4 inch strip. (I ended up making another that was 9x3 because this was too big for little Trigger). I folded and glued each side to make it nice and straight
Fold the sides into the middle and hot glue

Pinch in the middle and glue again

Cut another 1x3 inch strip and glue. *Glue to the front and then pinch and glue in the back so you can slip the collar through the back

I think he likes it! :) I slipped a bobby pin in the back of the bigger one, my sister will not approve!


Aaron's wreath
Super Simple! I won't lie, I got the idea off Pinterest...
- Spray paint a grapevine wreath (Less than $5 hobby lobby)
- Add silk flowers with a hot glue gun
- Use textured scissors to cut scrapbook paper, tie with raffia, and add sticky letters

Jace's Baby Shower
Again, just ridiculously easy! This just takes some patience because wrapping the yard takes a while and my hands started to hurt. I am a big baby though...
- Start with a plain Styrofoam wreath
- measure out the length of each colored section you want and mark with a pen
- Wrap and hot glue as you go!
- I cut scrapbook paper into triangles and stuck "It's a Boy" letters on each one. I glued them onto raffia and tied it on.
- The wooden cut outs all came from hobby lobby and came just like that
- For his name I just painted the letters tan and dipped the end of the sponge brush in the paint to make the polka dots!

Trigger's Bow Tie
I saw these on Etsy and lovedddd them, but obviously I dont have $30 to spend on a dog collar. I googled how to make a bow tie and just replaced "sew" with hot glue!
I felt like to make a seersucker bow tie I really needed a mimosa. Luckily Jacob had champagne the jewelry store gave him for buying my ring :) I ended up not using the iron adhesive because it was so small. I bought 1/2 yard of fabric from hobby lobby and could have done with about 90% less than that! Total it was only $5

Next I cut a 12x4 inch strip. (I ended up making another that was 9x3 because this was too big for little Trigger). I folded and glued each side to make it nice and straight

Fold the sides into the middle and hot glue

Pinch in the middle and glue again

Cut another 1x3 inch strip and glue. *Glue to the front and then pinch and glue in the back so you can slip the collar through the back

I think he likes it! :) I slipped a bobby pin in the back of the bigger one, my sister will not approve!


Subscribe to:
Posts (Atom)